How to Enlarge an Image Without Losing Quality
Enlarging an image is easy. Keeping it clear is the hard part.
If you drag a small image bigger in a design tool, browser, document editor, or basic photo app, the result often looks soft, blocky, or pixelated. That happens because normal resizing only stretches the pixels that already exist. It does not recover lost detail.
AI upscaling is different. Instead of only stretching the image, it analyzes the source and generates a larger version with cleaner edges, sharper texture, and more usable detail. It cannot make every image perfect, but it is usually the better option when you need to make a small, blurry, or compressed image larger without obvious quality loss.
If you want to try the workflow while reading, use the UpscaleImage.pro AI image upscaler. Upload your image, choose 2x, 4x, or 8x, then compare the result before downloading.


The Short Answer
To enlarge an image without losing quality:
- Start with the best source image you have.
- Use AI upscaling instead of basic resizing.
- Choose a realistic scale, such as 2x or 4x.
- Check important details at full size before downloading.
- Avoid repeatedly enlarging and recompressing the same file.
For most photos, 2x is the safest first choice. Use 4x when the source is clean enough and you need a much larger result. Use 8x only when the original image can support heavy enlargement or when you are comfortable reviewing the output carefully.
Why Images Lose Quality When You Enlarge Them
A digital image is made from pixels. When you enlarge it with ordinary resizing, the software has to fill a bigger canvas using the same original pixel information.
Basic resizing methods can make the image dimensions larger, but they do not truly add detail. As a result, you may see:
- Blurry edges
- Blocky shapes
- Soft facial features
- Smudged textures
- JPEG artifacts becoming more visible
- Text or fine lines breaking apart
This is why a small image might look acceptable in a thumbnail but poor when used in a product listing, presentation, print layout, or large social graphic.
Resize vs Upscale: What Is The Difference?
Resizing changes the width and height of an image. It is useful when you need a specific size, such as making an image fit a website slot or reducing a file for upload.
Upscaling is focused on making an image larger while improving how it looks at the new size. AI upscaling is especially useful when the source image is small, slightly blurry, compressed, or downloaded from a place where the original quality was reduced.
Use basic resizing when:
- You only need to make a large image smaller.
- You need a quick crop or exact width and height.
- The final image will stay small on screen.
Use AI upscaling when:
- You need the image to appear larger and clearer.
- You want to reduce visible pixelation.
- You need better detail for reuse, design, ecommerce, printing, or sharing.
- The original image looks too soft or compressed.
How to Enlarge an Image Without Losing Quality
Follow this workflow when you want a larger image that still looks clean.
1. Use the best original image
Before upscaling, find the cleanest version of the image. A slightly larger or less compressed source will usually upscale better than a tiny screenshot or a heavily saved JPEG.
Avoid starting from:
- Cropped screenshots when the original image is available
- Images saved many times through messaging apps
- Tiny thumbnails
- Files with strong compression artifacts
If the image is already damaged or very blurry, AI can still help, but the result depends heavily on the available detail.
2. Upload the image to an AI image upscaler
Open the AI image upscaler and upload your photo, picture, or graphic.
The best candidates for AI upscaling include:
- Small product photos
- Soft portraits
- Compressed web images
- Old photos
- Travel photos
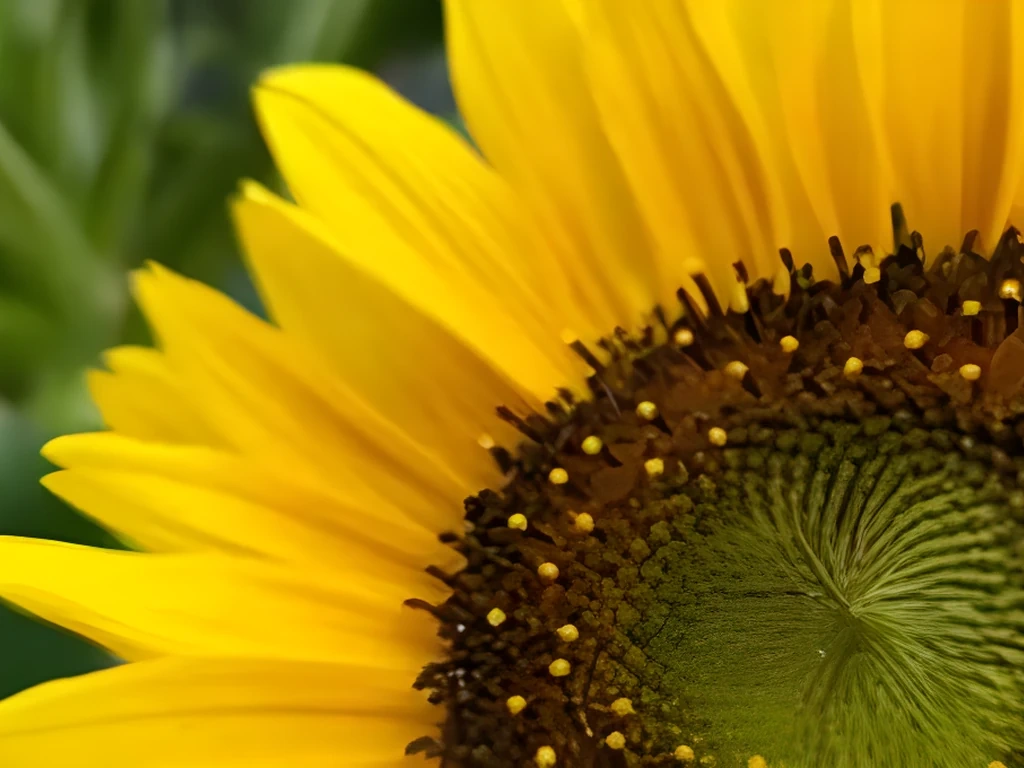
- Wildlife and texture images
- Artwork or illustrations with visible edges

3. Choose 2x, 4x, or 8x
The right scale depends on the source image and the final use.
Use 2x when:
- The image only needs to be moderately larger.
- You want the most natural result.
- The source image is noisy, blurry, or compressed.
- You are enlarging faces, product details, or fine texture.
Use 4x when:
- The source image is reasonably clear.
- You need a much larger output.
- The image will be used in a design, listing, presentation, or larger web layout.
Use 8x when:
- The source is clean enough to support heavy enlargement.
- You need a very large output.
- You are willing to inspect the final result closely.
If you are unsure, start with 2x. It is better to get a clean moderate enlargement than an oversized result with unnatural detail.
4. Review the important parts at full size
Do not judge the result only from a small preview. Open the output at full size and inspect the areas that matter most:
- Eyes, faces, and skin texture
- Product edges
- Logos and text
- Hair, fur, fabric, or feathers
- Background patterns
- High-contrast edges
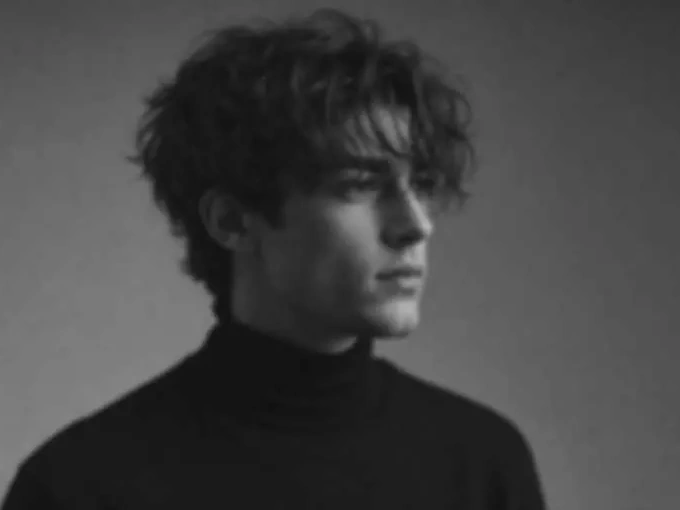
5. For portraits, compare results with face enhancement
Portraits need extra care because people notice small changes in eyes, noses, mouths, and skin texture. A general AI upscale can make a blurry portrait larger, but if the face is already soft or compressed, the enlarged result may show unnatural facial artifacts.
This is where face enhancement matters. UpscaleImage.pro uses Real-ESRGAN-style image upscaling with an optional face enhancement mode for portraits. When the image contains a clear human face, turning on face enhancement can help produce a more natural-looking result than general upscaling alone.
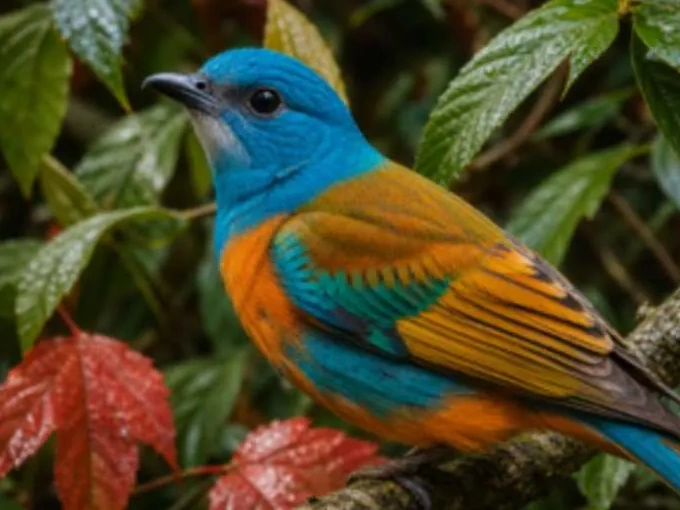
Use this as a portrait-specific check before downloading. Here is the same blurry portrait handled three ways:
Original: low-resolution portrait before upscaling.
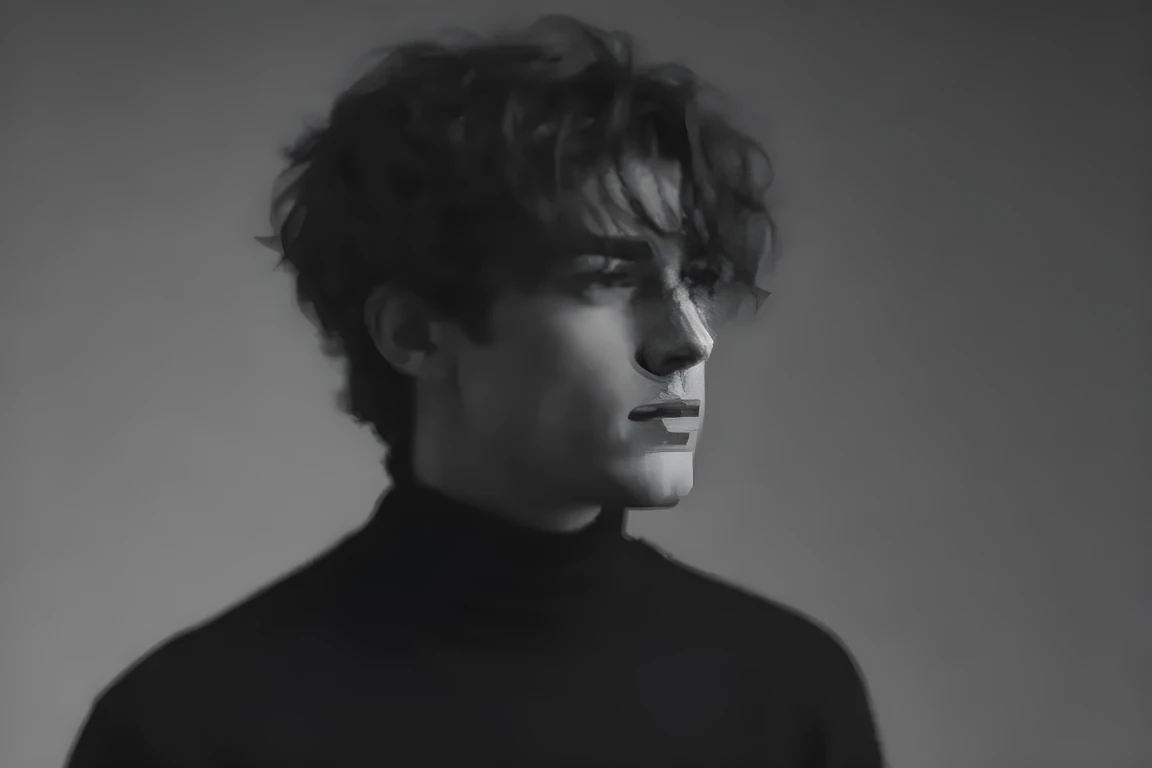
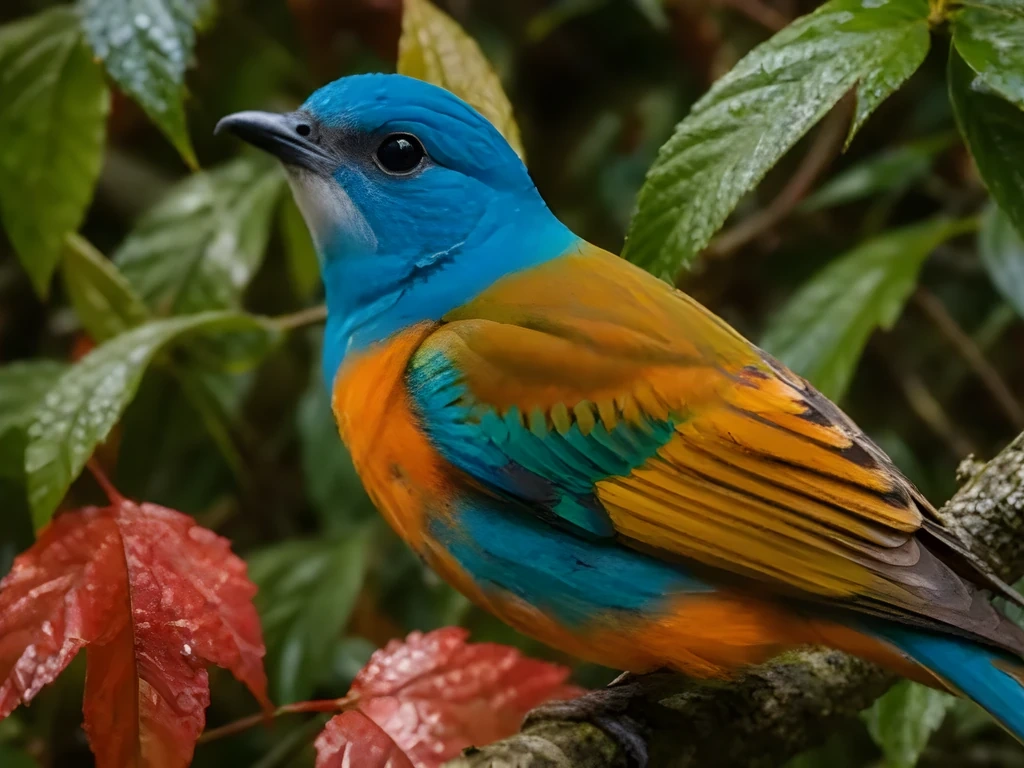
Upscaled without face enhancement: the image is larger, but the facial details look distorted and unnatural.
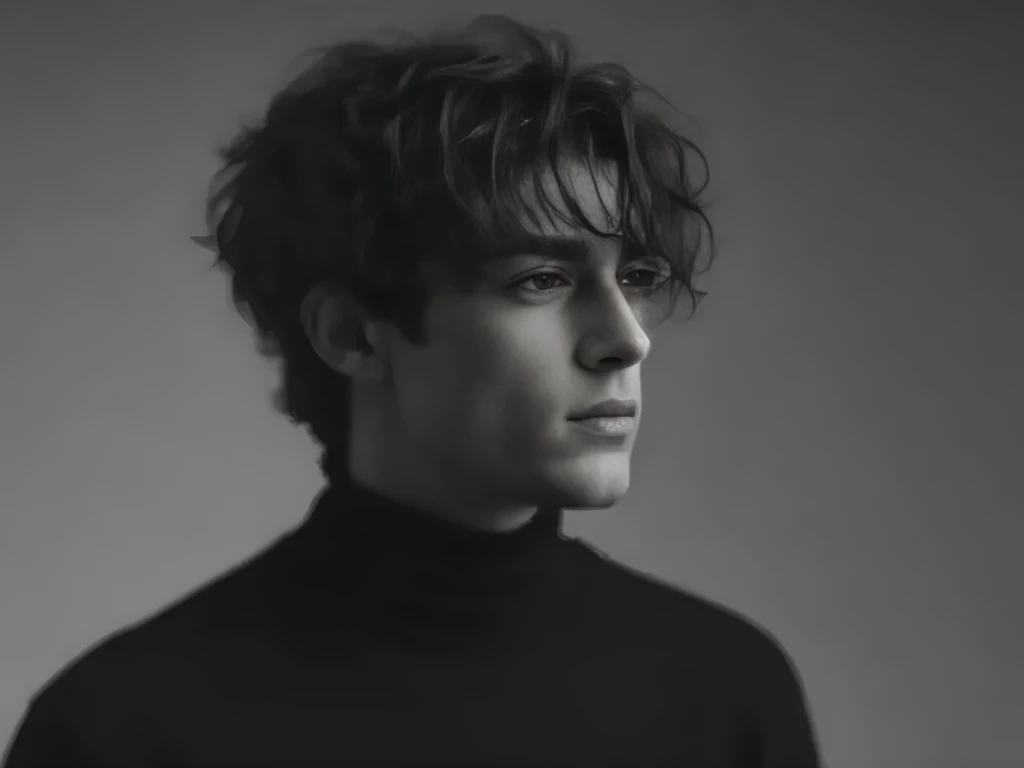
Upscaled with face enhancement enabled: the face looks more natural while the portrait is enlarged.
Use face enhancement when:
- The image is a portrait or the face is the main subject.
- The face looks blurry, compressed, or low-resolution.
- Eyes, nose, mouth, or skin texture look distorted after normal upscaling.
Leave it off or review carefully when:
- The image is a landscape, product photo, animal photo, screenshot, logo, or text-heavy graphic.
- The face is tiny and not important to the final use.
- You need strict identity fidelity and want to avoid any generated facial detail.
6. Download the result once you are happy with it
After the image looks good at full size, download the result and use that version as your new working file.
Avoid repeatedly uploading, enlarging, compressing, and enlarging again. Each extra cycle can add artifacts or make the image look less natural.
How to Enlarge a Photo Without Making It Pixelated
Pixelation usually appears when the original image does not have enough pixels for the new display size. AI upscaling helps by rebuilding edges and details instead of simply stretching the existing pixels.
For photos, the most important rule is to keep the scale realistic. A small clean image can often become much more usable. A tiny, blurry, heavily compressed image may improve, but it will still have limits.
If the image contains faces, use a conservative scale first and check the result carefully. Face details can look unnatural when an image is enlarged too aggressively.
Common Mistakes To Avoid
Enlarging the same image too many times
Run the upscale once from the best source file. Repeating the process can create an artificial look.
Choosing 8x when 2x is enough
Bigger is not always better. If your final layout only needs a moderate size increase, 2x or 4x may look cleaner.
Expecting AI to recover missing information perfectly
AI upscaling can improve detail, but it cannot know exactly what was lost in the original image. Very blurry faces, tiny text, or destroyed details may not become perfectly accurate.
Saving the final image with heavy compression
After upscaling, avoid exporting the result with very low quality settings. Heavy compression can undo some of the clarity you gained.
Best Uses For AI Image Enlargement
AI upscaling works especially well when you need to reuse an image in a larger context:
- Product images for ecommerce
- Blog and website visuals
- Presentation slides
- Social media graphics
- Portfolio images
- Real estate or travel photos
- Old family photos
- Low-resolution downloads that need cleaner detail
For print, remember that physical print quality depends on both pixel dimensions and print size. Upscaling can help create more pixels, but you should still check the final print dimensions before ordering.
FAQ
Can I enlarge an image without losing quality?
You can enlarge an image while reducing visible quality loss by using AI upscaling instead of basic resizing. The result depends on the source image. A clean source usually upscales better than a tiny, blurry, or heavily compressed file.
How do I enlarge a photo without making it pixelated?
Use an AI image upscaler, start with the best original photo, and choose a realistic scale such as 2x or 4x. Then inspect faces, edges, and important details at full size before downloading.
Is AI upscaling better than normal resizing?
For making an image larger and clearer, yes. Normal resizing changes dimensions but does not recover detail. AI upscaling is designed to create a larger image with cleaner edges and more usable detail.
Should I choose 2x, 4x, or 8x?
Choose 2x for the most natural moderate enlargement, 4x for a larger output from a reasonably clear source, and 8x only when you need a very large image and can review the result carefully.
Should I turn on face enhancement for portraits?
Use face enhancement when a portrait face looks blurry, compressed, or distorted after normal upscaling. Leave it off for landscapes, products, screenshots, logos, text-heavy images, or cases where you need to inspect identity details very carefully.
Can I make a picture bigger for printing?
Yes, AI upscaling can help create a larger file for print use. However, print quality also depends on the final print size, viewing distance, and source image quality.
What if the enlarged image still looks blurry?
Try a lower scale, use a better source file, or check whether the original image is too blurred or compressed. Some images cannot be enlarged dramatically without visible limits.
Final Recommendation
If your goal is to make an image larger without making it look blurry or pixelated, use AI upscaling first, choose a realistic scale, and review the final image at full size.
Start with 2x when you want the safest result. Move to 4x when the image is clean and you need more size. Use 8x only when the source image has enough detail to support a larger transformation.
You can start from the UpscaleImage.pro image upscaler and test the scale that best fits your source image.